Check out this video by Francine Dufour Jones on YouTube.
Here is info from Susan Louise Moyer's website, my teacher, on the steaming process:
Steam Fixation Process
Working with an assistant will make the job easier, since paper will stick to the decorative resist (black, gold. silver etc.) and it is next to impossible to remove it.
The silk should be rolled for steaming between sheets of fabric.
I use freshly washed old cotton or cotton polyester sheets that can be rewashed and reused. After the selvages have been removed, the width of the fabric sheets should be at least 4” wider than the silk.
Prepare enough fabric sheeting to cover the length of the silk with two layers of sheeting 6 inches longer than the silk.
Cut two lengths of newsprint paper 2 feet longer than the length of the silk. The additional length becomes the protection for outside of the rolled silk.
Roll the silk around the steamer core as follows:
The silk is the first layer.
Cover the silk in the following order:
one layer of fabric sheeting
two layers of newsprint paper
one layer of fabric sheeting
NOTE: The newsprint paper should extend 1 1/2 -2 feet beyond the layer of silk and fabric sheeting.
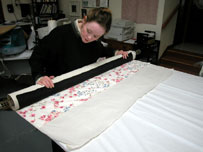
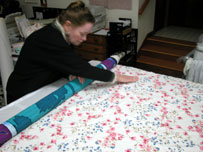
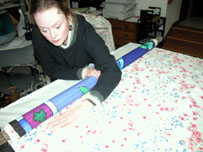
Carefully roll the layers around the steamer core. If the layers are in the correct order you will see the silk painting on the outside of the roll. Seeing the silk gives you the opportunity to prevent wrinkles. Constantly smooth out the silk as you roll and brush your hand over the layers and away from the roll. While rolling the silk, keep even pressure and make sure the edges of the silk, sheeting, and the paper are as lined up as possible. If there is not enough paper at the end of the roll to go around the silk, add more paper.
Secure the roll with 6 or more small pieces of masking tape. (Do not use one long piece of tape placed straight across the length of the roll. This will block the steam and may cause uneven steam fixation and unwanted lines in the painting.)
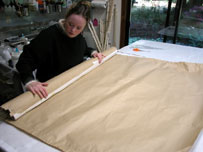
Cut a piece of brown uncoated craft paper into 55” wide x 48-50” (craft paper needs to be wider than the rolled silk bundle).
Roll the craft paper around the bundle of rolled silk.
Secure the craft paper around the roll by staggering six or so pieces of masking tape along the edge.
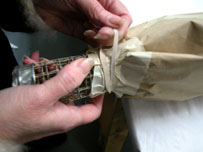
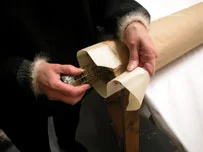
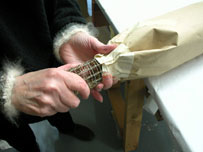
Secure the ends of the roll with 2” wide masking tape. Place one half the width of the tape around the edge of the roll and pinch the other half onto the core so it seals the ends. Secure the tape onto the core with a rubber band at each end.
Rolling a painting in preparation for steam setting the dye
The layers of silk and sheeting are being carefully rolled around the steamer core. When the layers are in the correct order, as you see here, the silk painting will be on the outside of the roll. Seeing the silk gives Susan the opportunity to prevent wrinkles. As the layers are rolled, Susan constantly smoothes out the silk by brushing her hand over the layers pushing any lumps or wrinkles out and away from the roll.
While rolling the silk, she keeps even pressure and makes sure the edges of the silk, sheeting, and the paper are as lined up as possible. As seen here, the newsprint paper should extend at least 18” beyond the layer of silk and fabric sheeting. Keep rolling to the end and then secure the roll with 6 or more small pieces of masking tape.
For additional protection against condensation, the rolled silk is covered with a piece of uncoated brown craft paper. In this case, 55” wide craft paper is secured around the roll by staggering six or so pieces of masking tape along the edge.
Secure the ends of the roll with 2” wide masking tape. Place one half the width of the tape around the edge of the craft paper.
Pinch the other half onto the core sealing the ends.Secure the tape onto the core with a rubber band at each end.
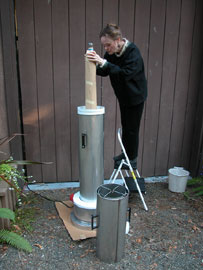
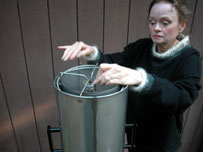
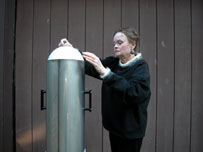
Lift the top section of the steamer in place and secures the roll with the second quadrangle. Make sure the hump on the quadrangle is down holding the roll in place
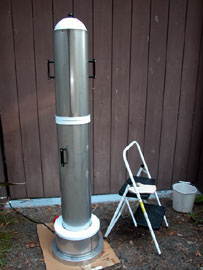
Place the bottom section of the fabric steamer onto the base. To prevent condensation from collecting and water from staining the silk, center the rolled bundle over the center hump of the quadrangle. The quadrangle is the part attached to the bottom of the steamer. Make sure the rolled bundle is securely suspended several inches above the water level.
Steam for 3-3 1/2 hours.
Susan has not had to add water to this steamer but if this is your first time, check the water level at least once during the steaming.
Rocket Steamers and Stove Top Steamers are available from Susan's catalog. Click Here>
Once you are sure the roll is securely placed between the bottom and top quadrangles and does not rest on the sides of the fabric steamer, put the lid on the steamer.
7/1/11

